
智能客服
常见问题
公众号
二维码
二维码

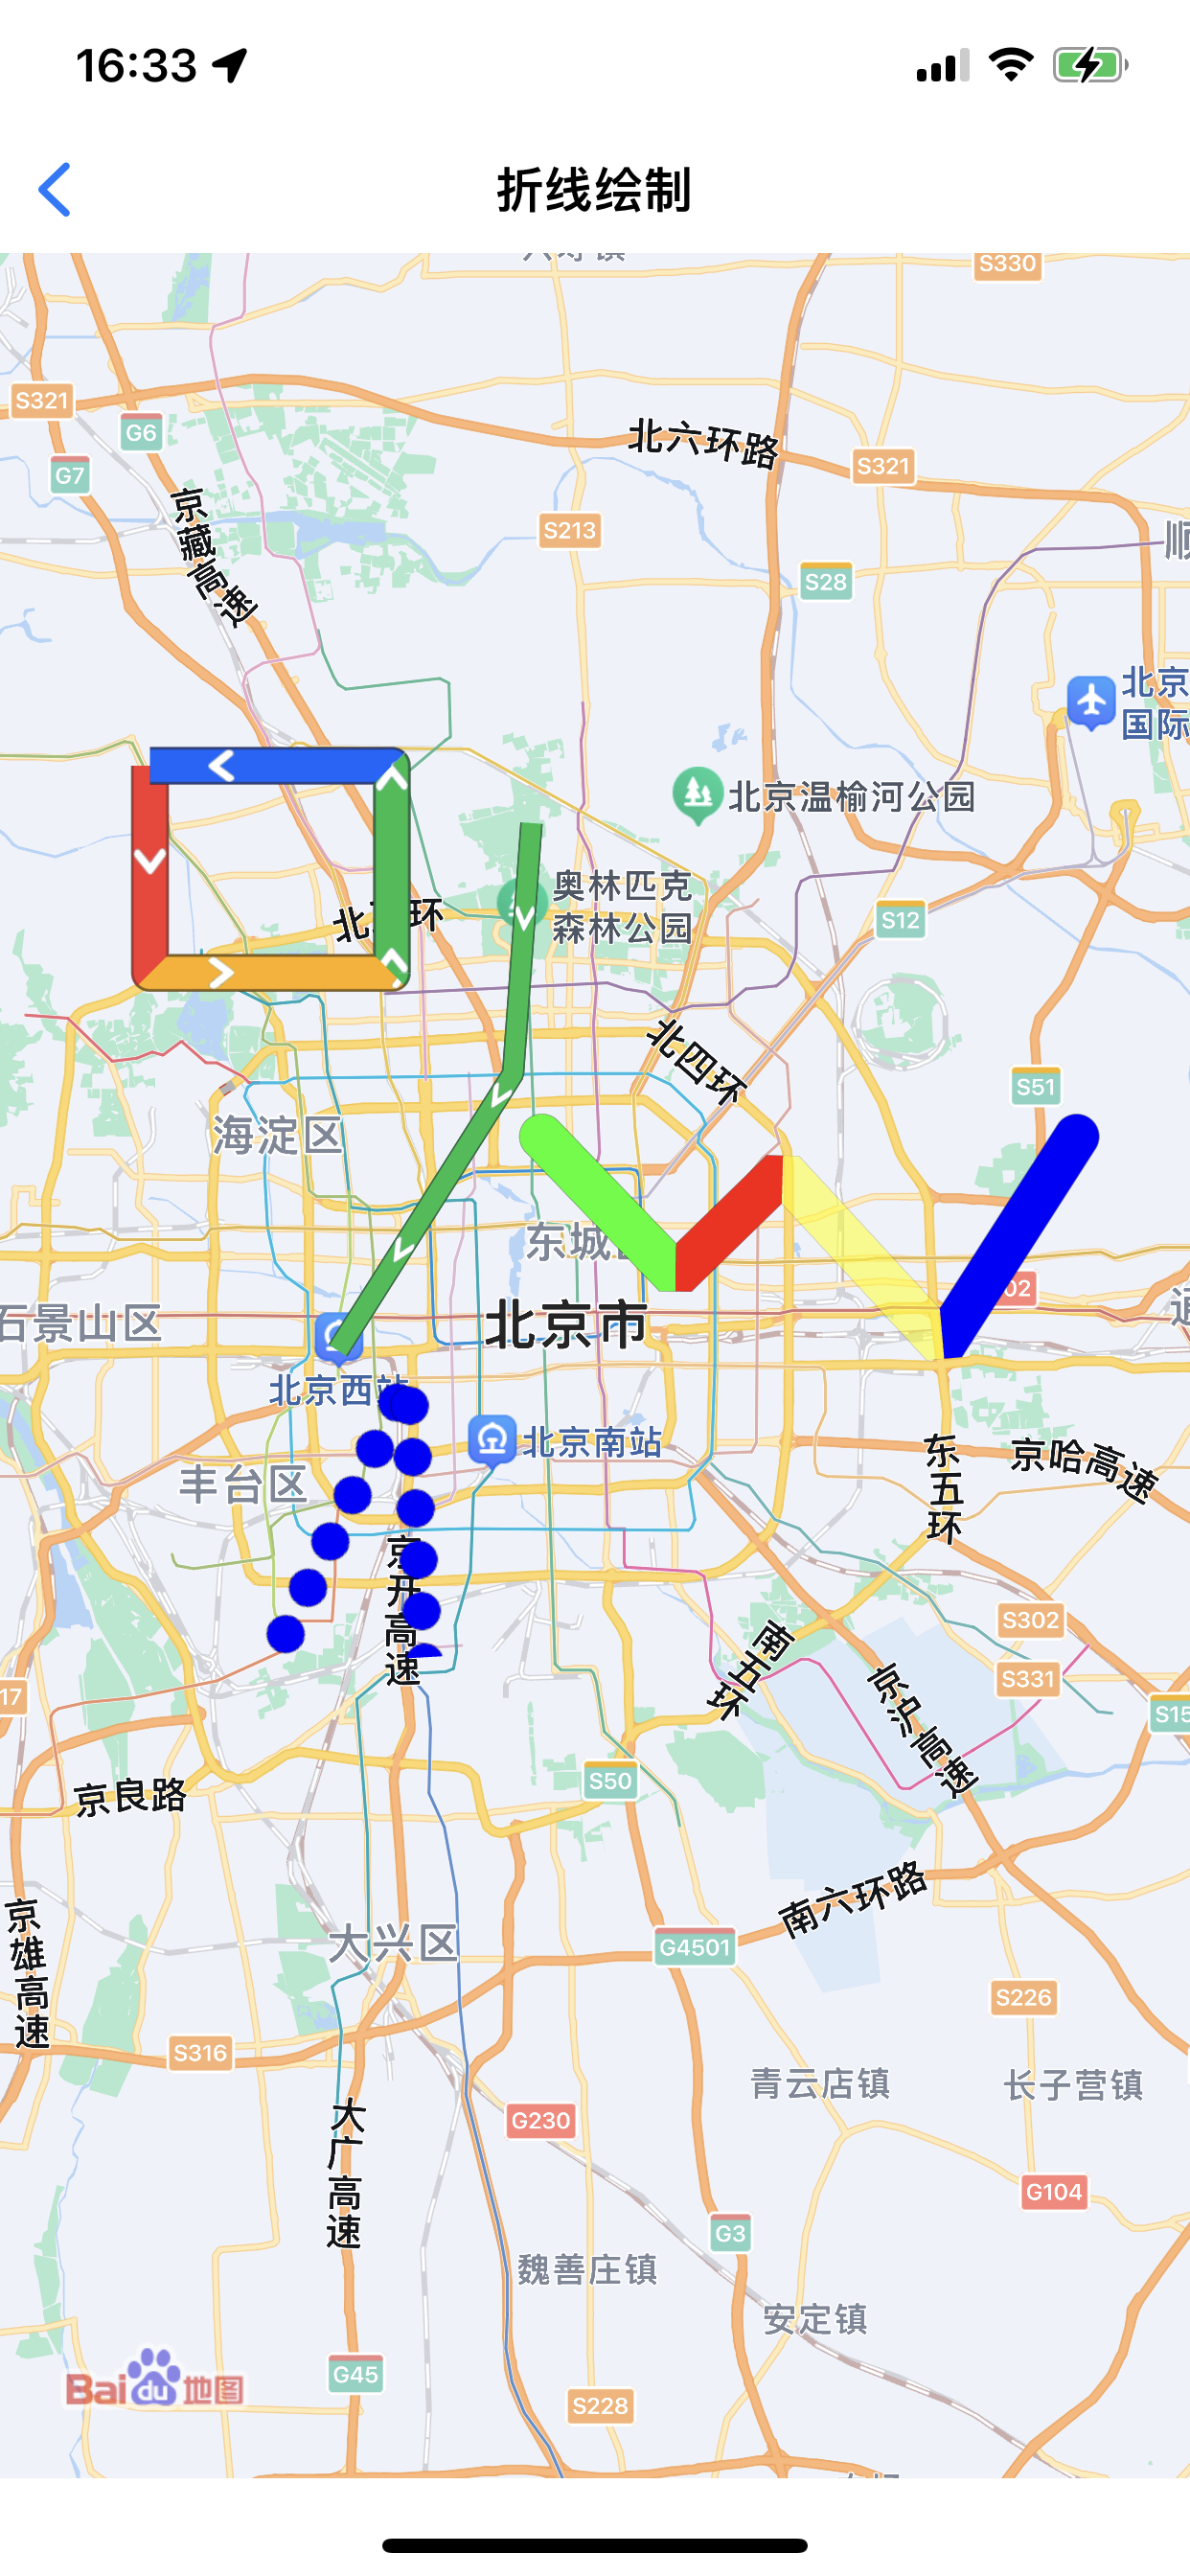
折线类为 BMKPolyline,由一组经纬度坐标组成,并以有序序列形式建立一系列的线段。
BMKMapView *mapView = [[BMKMapView alloc]initWithFrame:self.view.bounds];mapView.delegate = self;[self.view addSubView:mapView];
// 添加折线覆盖物CLLocationCoordinate2D coords[5] = {0};coords[0] = CLLocationCoordinate2DMake(39.968, 116.260);coords[1] = CLLocationCoordinate2DMake(39.912, 116.324);coords[2] = CLLocationCoordinate2DMake(39.968, 116.373);coords[3] = CLLocationCoordinate2DMake(39.912, 116.439);coords[4] = CLLocationCoordinate2DMake(39.968, 116.490);BMKPolyline *polyline = [BMKPolyline polylineWithCoordinates:coors count:5];[_mapView addOverlay:polyline];
- (BMKOverlayView *)mapView:(BMKMapView *)mapView viewForOverlay:(id <BMKOverlay>)overlay{if ([overlay isKindOfClass:[BMKPolyline class]]){BMKPolylineView *polylineView = [[BMKPolylineView alloc] initWithPolyline:overlay];//设置polylineView的画笔颜色为蓝色polylineView.strokeColor = [[UIColor alloc] initWithRed:19/255.0 green:107/255.0 blue:251/255.0 alpha:1.0];//设置polylineView的画笔宽度为16polylineView.lineWidth = 16;//圆点虚线,V5.0.0新增// polylineView.lineDashType = kBMKLineDashTypeDot;//方块虚线,V5.0.0新增// polylineView.lineDashType = kBMKLineDashTypeSquare;return polylineView;}return nil;}
效果如图:
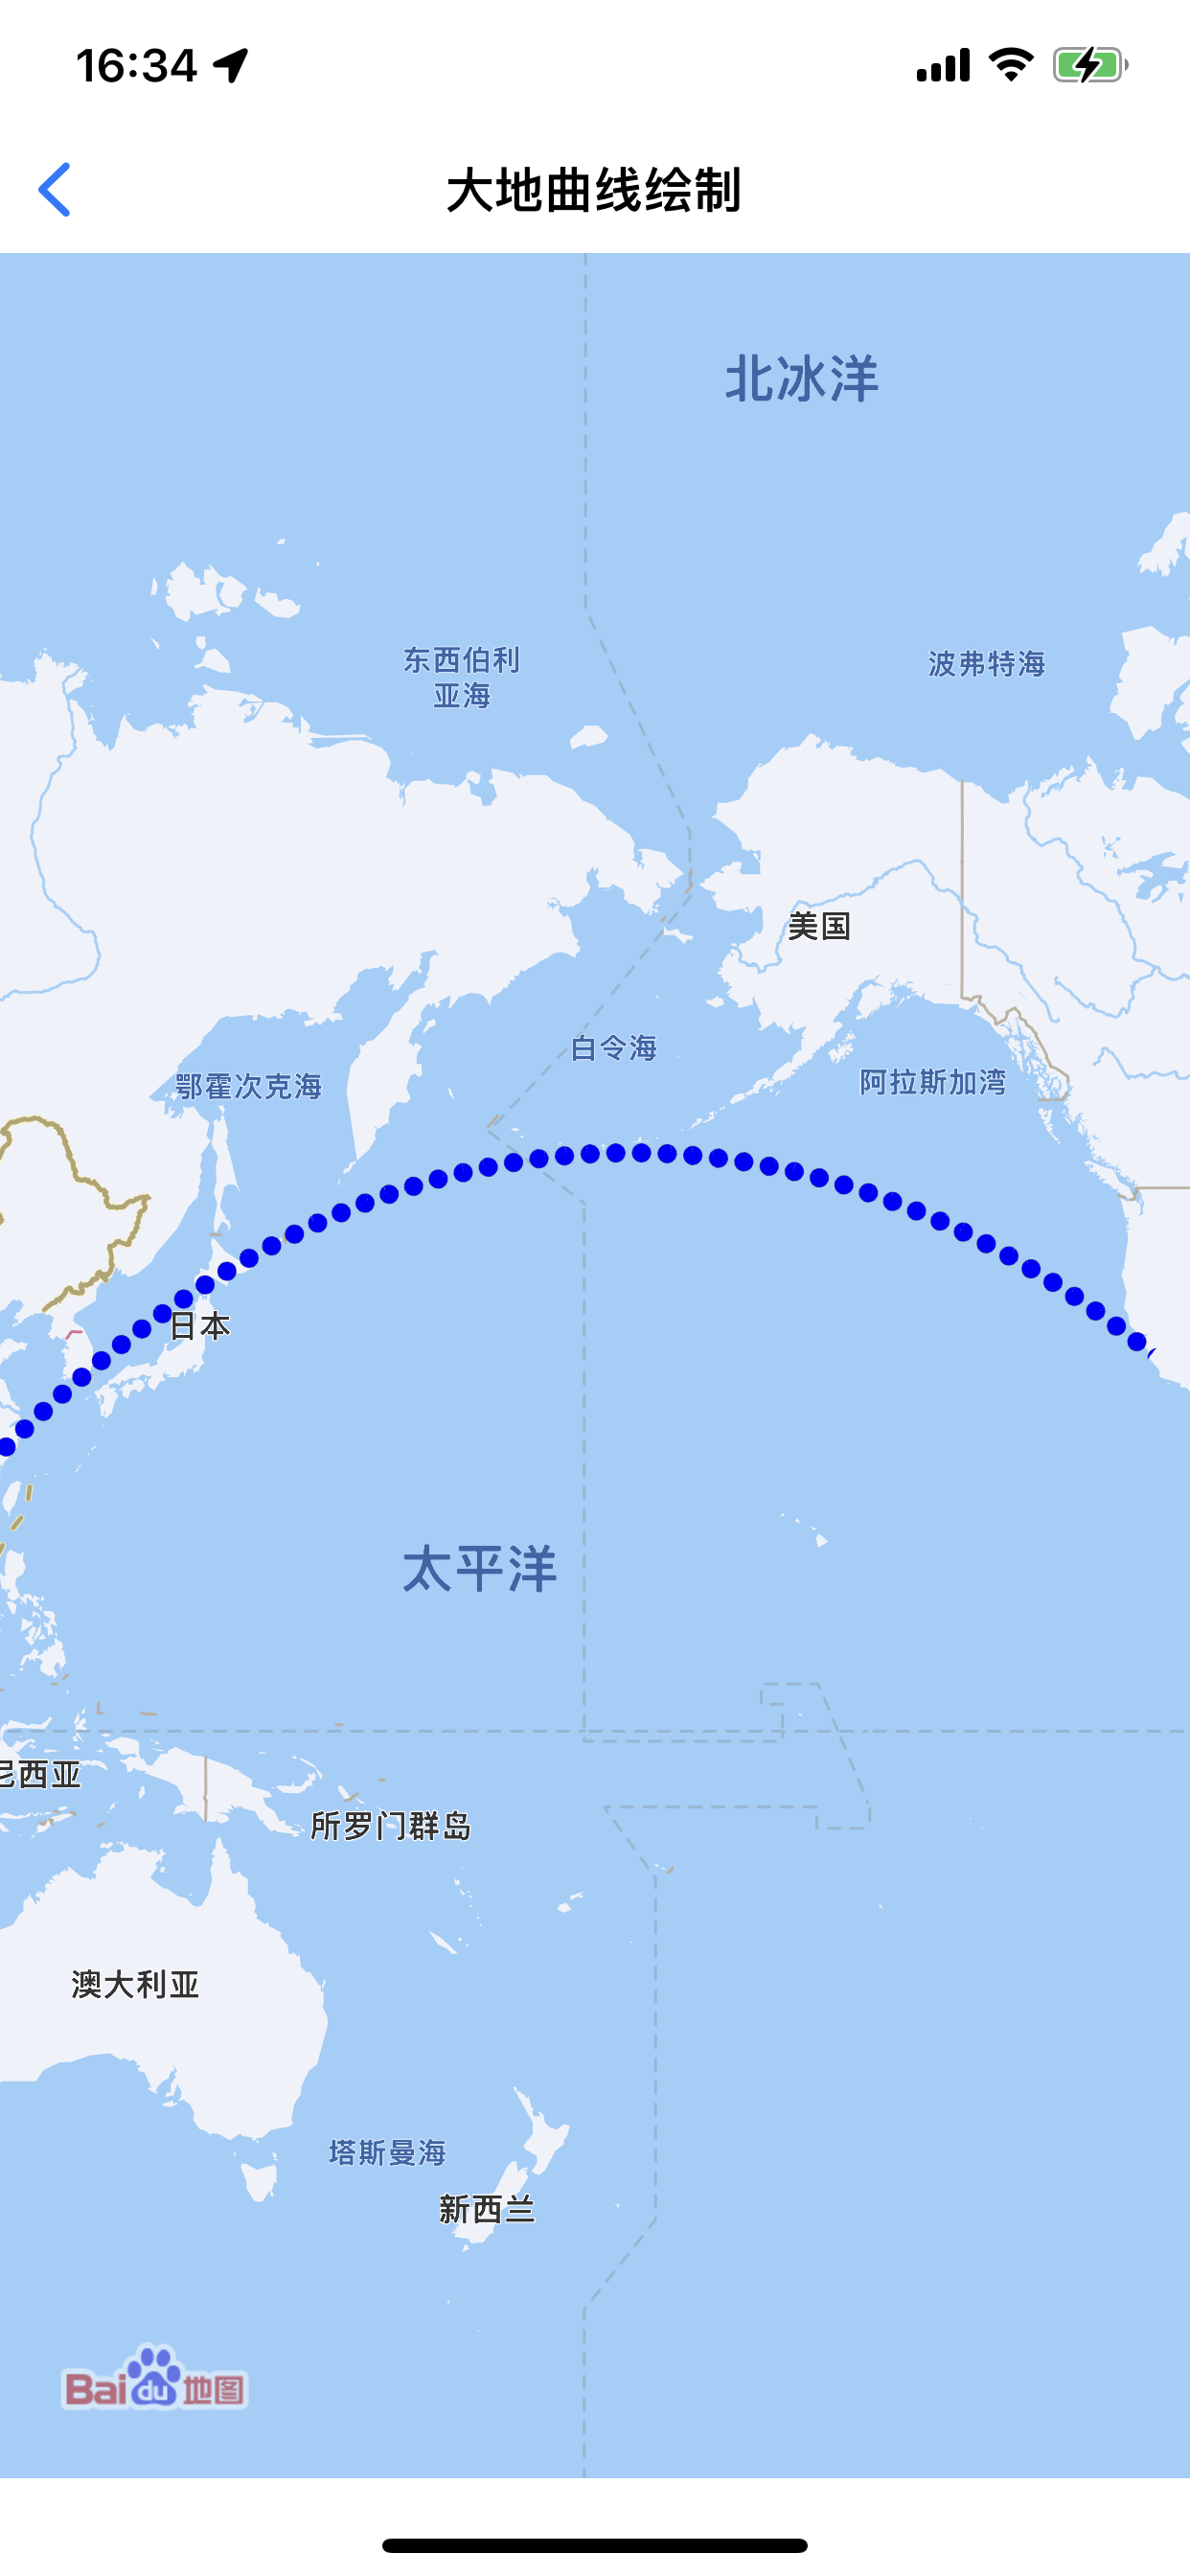
iOS地图SDK支持大地曲线绘制能力。
CLLocationCoordinate2D coords[2] = {0};coords[1] = CLLocationCoordinate2DMake(36.53, -121.47);coords[0] = CLLocationCoordinate2DMake(22.33, 114);BMKGeodesicLine *geodesicLine = [BMKGeodesicLine geodesicLineWithCoordinates:coords count:2];// 若经度跨180,则须设置lineDirectionCross180参数_geodesicLine.lineDirectionCross180 = kBMKLineDirectionCross180TypeWEST_TO_EAST;[_mapView addOverlay:geodesicLine];
- (BMKOverlayView *)mapView:(BMKMapView *)mapView viewForOverlay:(id<BMKOverlay>)overlay {if ([overlay isKindOfClass:[BMKGeodesicLine class]]) {BMKGeodesicLineView *geodesicView = [[BMKGeodesicLineView alloc] initWithGeodesicLine:overlay];geodesicView.strokeColor = [UIColor colorWithRed:0 green:0 blue:1 alpha:1];geodesicView.lineWidth = 6;geodesicView.lineDashType = kBMKLineDashTypeDot;return geodesicView;}return nil;}
效果如图:
iOS地图SDK支持渐变线绘制能力。
CLLocationCoordinate2D coords[5] = {0};coords[0] = CLLocationCoordinate2DMake(39.965, 116.404);coords[1] = CLLocationCoordinate2DMake(39.925, 116.454);coords[2] = CLLocationCoordinate2DMake(39.955, 116.494);coords[3] = CLLocationCoordinate2DMake(39.905, 116.554);coords[4] = CLLocationCoordinate2DMake(39.965, 116.604);// 构建分段渐变颜色索引数组NSArray *drawIndexs = [NSArray arrayWithObjects:[NSNumber numberWithInt:0],[NSNumber numberWithInt:1],[NSNumber numberWithInt:2],[NSNumber numberWithInt:3], nil];BMKGradientLine *gradientLine = [BMKGradientLine gradientLineWithCoordinates:coords count:5 drawIndexs:drawIndexs]; [_mapView addOverlay:gradientLine];
- (__kindof BMKOverlayView *)mapView:(BMKMapView *)mapView viewForOverlay:(id<BMKOverlay>)overlay {if ([overlay isKindOfClass:[BMKGradientLine class]]) {// 初始化一个overlay并返回相应的BMKGradientLineView的实例BMKGradientLineView *gradientLineView = [[BMKGradientLineView alloc] initWithGradientLine:overlay];// 渐变线颜色数组gradientLineView.strokeColors = [NSArray arrayWithObjects:[[UIColor alloc] initWithRed:1 green:0 blue:0 alpha:1],[[UIColor alloc] initWithRed:1 green:1 blue:0 alpha:0.5],[[UIColor alloc] initWithRed:0 green:0 blue:1 alpha:1],[[UIColor alloc] initWithRed:0 green:1 blue:0 alpha:1],nil];// 画笔宽度为12gradientLineView.lineWidth = 12;return gradientLineView;}return nil;}
效果如图:

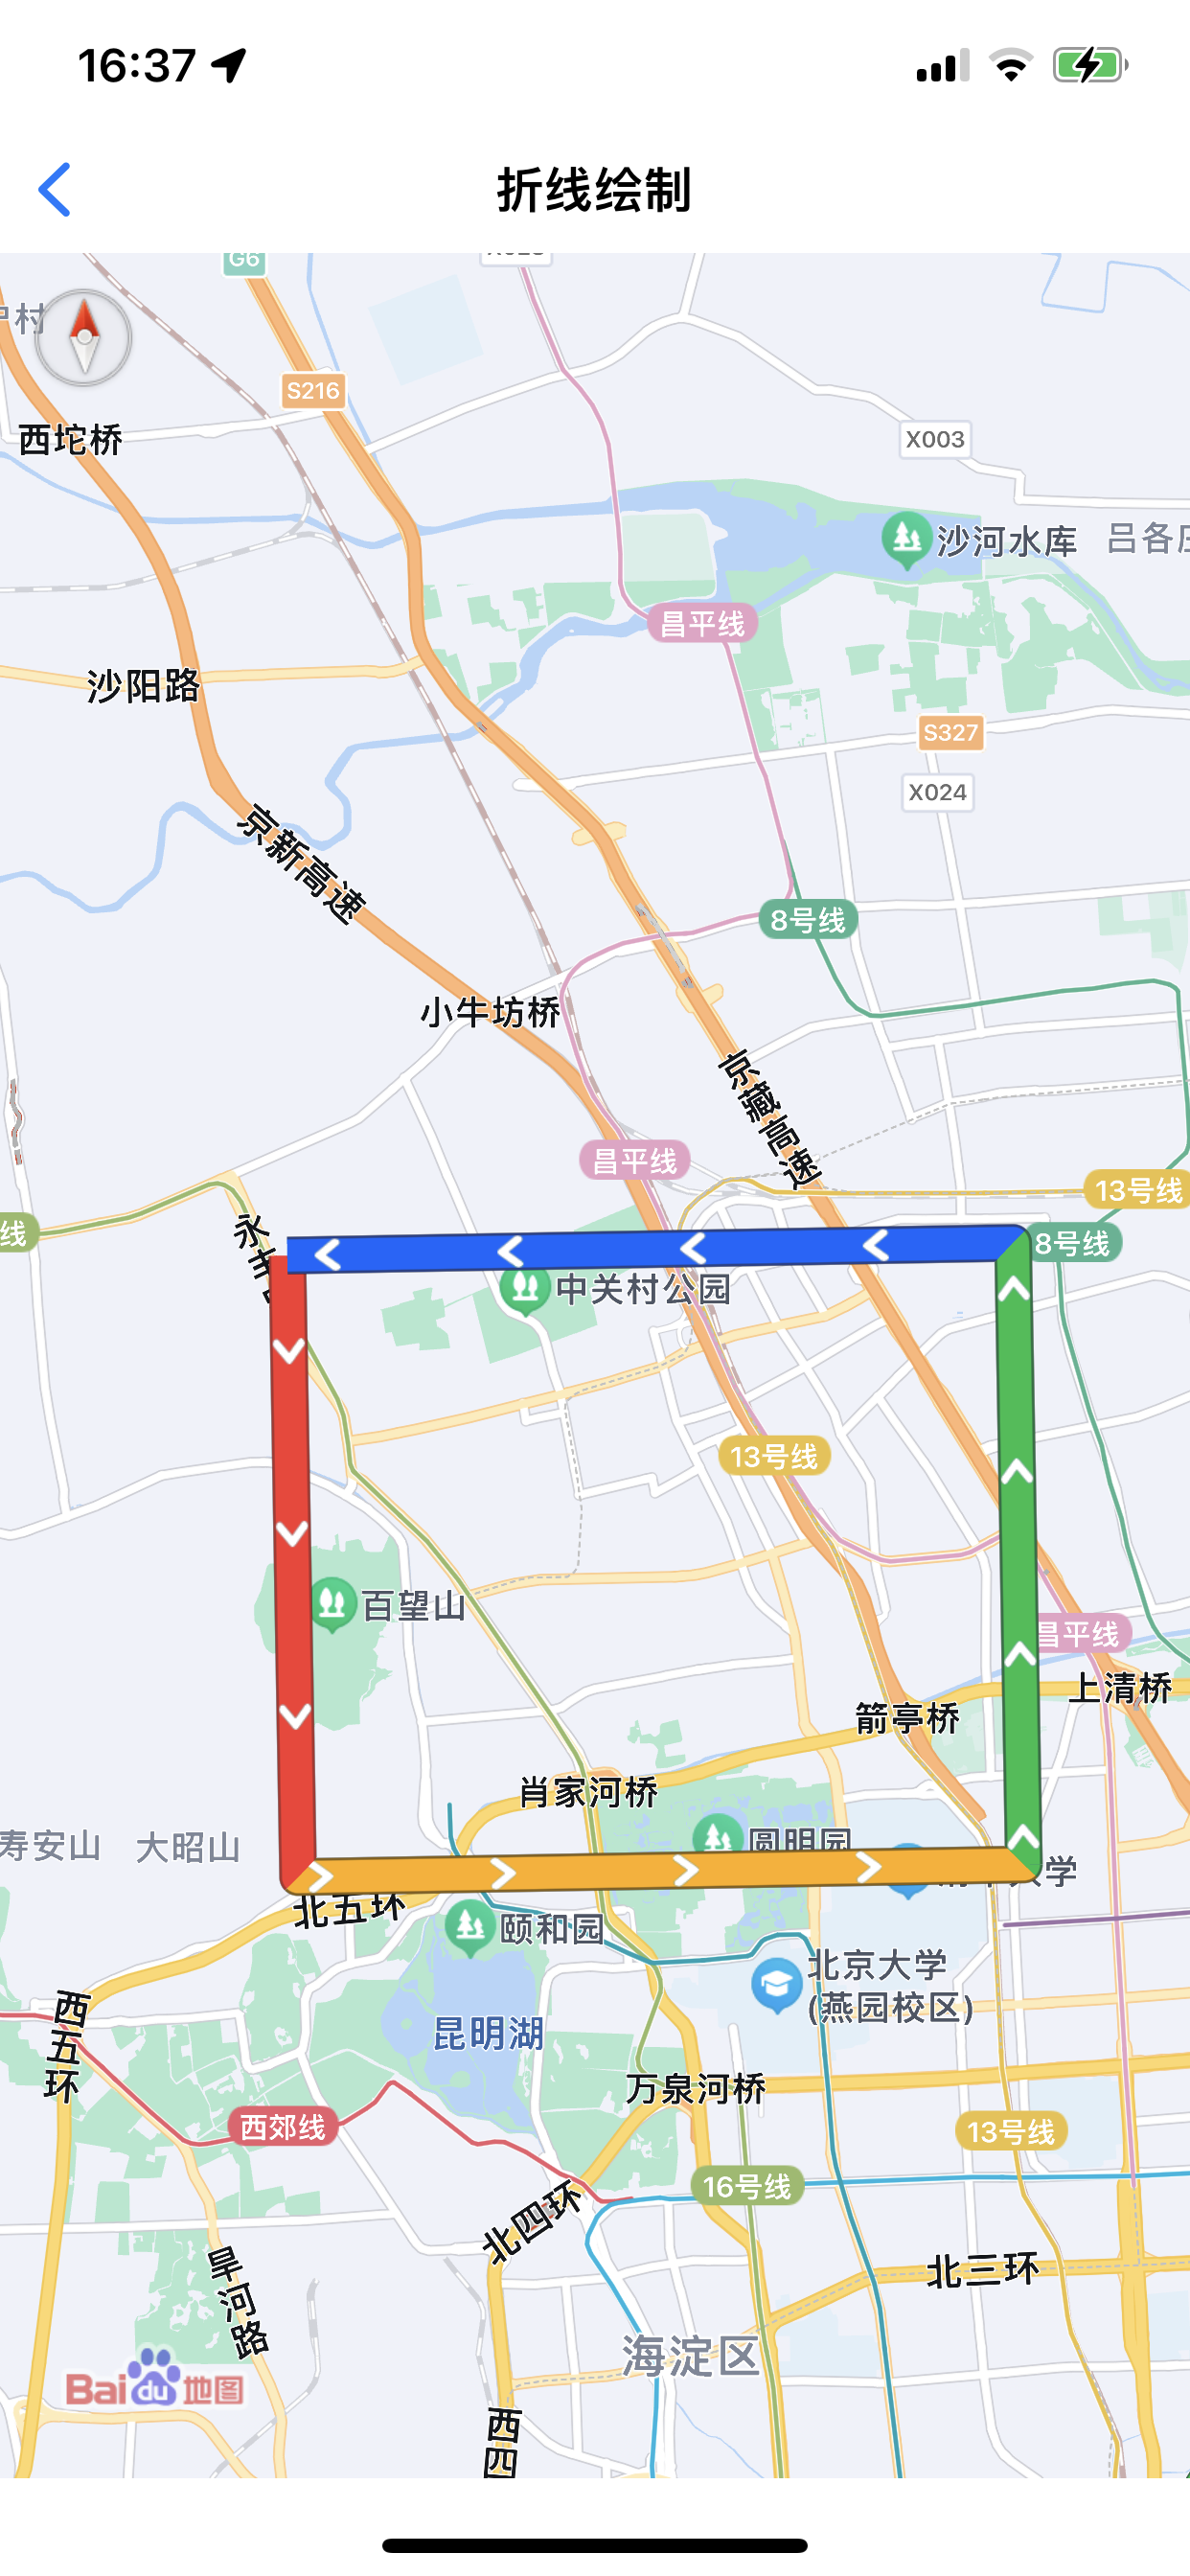
iOS地图SDK支持折线多段颜色绘制能力。
CLLocationCoordinate2D coords[5] = {0};coords[0] = CLLocationCoordinate2DMake(39.968, 116.260);coords[1] = CLLocationCoordinate2DMake(39.912, 116.324);coords[2] = CLLocationCoordinate2DMake(39.968, 116.373);coords[3] = CLLocationCoordinate2DMake(39.912, 116.439);coords[4] = CLLocationCoordinate2DMake(39.968, 116.490);//构建分段颜色索引数组NSArray *drawIndexs = [NSArray arrayWithObjects:[NSNumber numberWithInt:0],[NSNumber numberWithInt:1],[NSNumber numberWithInt:2],[NSNumber numberWithInt:3], nil];// 构造分段折线colorfulPolyline = [BMKMultiPolyline multiPolylineWithCoordinates:coords count:5 drawIndexs:colorIndexs];[_mapView addOverlay:colorfulPolyline];
//根据overlay生成对应的View- (__kindof BMKOverlayView *)mapView:(BMKMapView *)mapView viewForOverlay:(id <BMKOverlay>)overlay {if ([overlay isKindOfClass:[BMKMultiPolyline class]]){BMKMultiColorPolylineView *colorfulPolylineView = [[BMKMultiColorPolylineView alloc] initWithMultiPolyline:overlay];// 设置polylineView的画笔宽度为12colorfulPolylineView.lineWidth = 12;colorfulPolylineView.colors = [NSArray arrayWithObjects:[[UIColor alloc] initWithRed:246/255.0 green:57/255.0 blue:57/255.0 alpha:1.0],[[UIColor alloc] initWithRed:253/255.0 green:173/255.0 blue:42/255.0 alpha:1.0],[[UIColor alloc] initWithRed:28/255.0 green:188/255.0 blue:82/255.0 alpha:1.0],[[UIColor alloc] initWithRed:19/255.0 green:107/255.0 blue:251/255.0 alpha:1.0],nil];// 设置头尾处圆帽样式,V5.0.0新增colorfulPolylineView.lineCapType = kBMKLineCapRound;return colorfulPolylineView;}return nil;}
效果如图:

iOS地图SDK支持折线分段颜色绘制能力。
纹理素材格式:纹理图宽高片须是2的整数幂,如64*64,否则无效;若设置了纹理图片,设置线颜色类型将无效。
//构建顶点数组CLLocationCoordinate2D coords[5] = {0};coords[0] = CLLocationCoordinate2DMake(39.968, 116.260);coords[1] = CLLocationCoordinate2DMake(39.912, 116.324);coords[2] = CLLocationCoordinate2DMake(39.968, 116.373);coords[3] = CLLocationCoordinate2DMake(39.912, 116.439);coords[4] = CLLocationCoordinate2DMake(39.968, 116.490);//构建分段颜色索引数组NSArray *drawIndexs = [NSArray arrayWithObjects:[NSNumber numberWithInt:0],[NSNumber numberWithInt:1],[NSNumber numberWithInt:2],[NSNumber numberWithInt:3], nil];// 构造分段折线BMKMultiPolyline *mulTexturePolyline = [BMKMultiPolyline multiPolylineWithCoordinates:coords count:5 drawIndexs:drawIndexs];[_mapView addOverlay:mulTexturePolyline];
//根据overlay生成对应的View - (__kindof BMKOverlayView *)mapView:(BMKMapView *)mapView viewForOverlay:(id <BMKOverlay>) overlay {if ([overlay isKindOfClass:[BMKMultiPolyline class]]){BMKMultiTexturePolylineView *mulTexturePolylineView = [[BMKMultiTexturePolylineView alloc] initWithMultiPolyline:overlay];// 设置polylineView的画笔宽度为12mulTexturePolylineView.lineWidth = 12;mulTexturePolylineView.textureImages = @[[UIImage imageNamed:@"traffic_texture_congestion"],[UIImage imageNamed:@"traffic_texture_slow"],[UIImage imageNamed:@"traffic_texture_smooth"],[UIImage imageNamed:@"traffic_texture_unknown"]];nil];// LineJoinType,默认是kBMKLineJoinBevel(不支持虚线)// 拐角处圆角衔接mulTexturePolylineView.lineJoinType = kBMKLineJoinRound;// 拐角处平角衔接mulTexturePolylineView.lineJoinType = kBMKLineJoinBevel;// 拐角处尖角衔接,ps尖角连接(尖角过长(大于线宽)按平角处理)mulTexturePolylineView.lineJoinType = kBMKLineJoinMiter;return mulTexturePolylineView}return nil;}
效果如图:
Since 6.5.7 iOS地图SDK支持发光线绘制能力。
#pragma mark - BMKMapViewDelegate- (__kindof BMKOverlayView *)mapView:(BMKMapView *)mapView viewForOverlay:(id<BMKOverlay>)overlay {if ([overlay isEqual:_polyline]) {BMKPolylineView *polylineView = [[BMKPolylineView alloc] initWithPolyline:overlay];// 设置polylineView的画笔颜色为蓝色polylineView.strokeColor = [[UIColor yellowColor] colorWithAlphaComponent:1];// 设置polylineView的画笔宽度为10polylineView.lineWidth = 10;polylineView.lineCapType = kBMKLineCapRound;polylineView.lineJoinType = kBMKLineJoinBevel;polylineView.lineBloomMode = kBMKLineBloomModeGradient;polylineView.lineBloomWidth = 10 * 1.5f;polylineView.lineBloomAlpha = 255.f;polylineView.lineBloomGradientASPeed = 10;return polylineView;} else if ([overlay isEqual:_gradientLine]) {BMKGradientLineView *gradientLineView = [[BMKGradientLineView alloc] initWithOverlay:overlay];gradientLineView.strokeColors = @[[[UIColor yellowColor] colorWithAlphaComponent:0.5],[UIColor colorWithRed:1.f green:0.f blue:0.f alpha:0.5f],[UIColor colorWithRed:0.f green:1.f blue:0.f alpha:0.5f],[UIColor colorWithRed:1.f green:0.84 blue:0.f alpha:0.5f],[UIColor colorWithRed:0.58 green:0.44 blue:0.86 alpha:0.5f],[UIColor colorWithRed:1 green:1 blue:0 alpha:1]];gradientLineView.lineWidth = 8;gradientLineView.isClickable = YES;gradientLineView.lineBloomMode = kBMKLineBloomModeBlur;gradientLineView.lineBloomWidth = 8 * 2.0f;gradientLineView.lineBloomAlpha = 155.f;return gradientLineView;}return nil;}
效果如下图所示:

上一篇
下一篇
本篇文章对您是否有帮助?